Installation Instructions
Preparations
- Check that the requirements are met.
- Follow internal Lime Technologies documentation for how to onboard a new customer with Syncify.
For All On-Premise ERP Systems
This applies to the systems listed as on-premise here.
- Make sure that Syncify can get access to the server where the Syncify service should be installed (typically on the ERP server).
System Specific Preparations
There are additional specific preparations to make per ERP system.
Installation in Lime CRM
Follow this checklist for everything that needs to be done in Lime CRM to set up the integration.
- If cloud with customizations:
- Add the package
limepkg-erp-connectoras a dependency to your solution. - Build and deploy your solution.
- Add the package
- If on-premise: Restart all Lime CRM services (
Web server,Event handler,Task handler) withlimefu restart all. - In Lime Admin, go to the Setup page in ERP Connector's settings and follow the installation instructions.
- Perform the necessary steps in LISA.
- Prepare any limetypes used in the integration that are outside the standard ERP Connector, i.e., other limetypes besides company, invoice and invoicerow, here.
- Configure according to instructions here.
- Configure the scheduled calculations according to instructions here.
- If using the Lime CRM Desktop Client: Follow the steps for the Desktop Client.
- Do the concluding steps described here.
LISA
- Only valid for Lime CRM Desktop Client: Add the icons for the tables
invoiceandinvoicerow. The icons are found in the folderlisa\iconsin the LIP package. If you cannot find the tables in LISA, refresh the browser. - Only valid for Lime CRM Desktop Client: Add descriptive expressions for
invoiceandinvoicerow. The descriptive expressions are found in text files in the folderlisa\descriptives. - Set the
SQL for updateproperty on the fieldcompany.fullinvoiceaddressaccording to the text file in the folderlisa\sql_on_update. - Set the
SQL for updateproperty on the fieldinvoice.customeridaccording to the text file in the folderlisa\sql_on_update - During the installation, two users were created:
- The
erpmigration@limeuser will run the migration from the ERP system and will also be used by Syncify to log in to the Lime CRM client to look at the data during and right after the migration. Create a coworker card for the user so it can be used to log into a Lime CRM client, and provide Syncify with the username and password. - The
erpsync@limeuser will run the continuous sync from the ERP system to Lime CRM, and it also calculates the sales trend and turnover numbers every night. If on-premise: Make sure the user name is configured here. Provide Syncify with the API key that was generated for this user during the installation.
- The
- Create a security policy
tbl_erp. Give the group(System) ERP Connector"full rights. Give the groupUsersread access.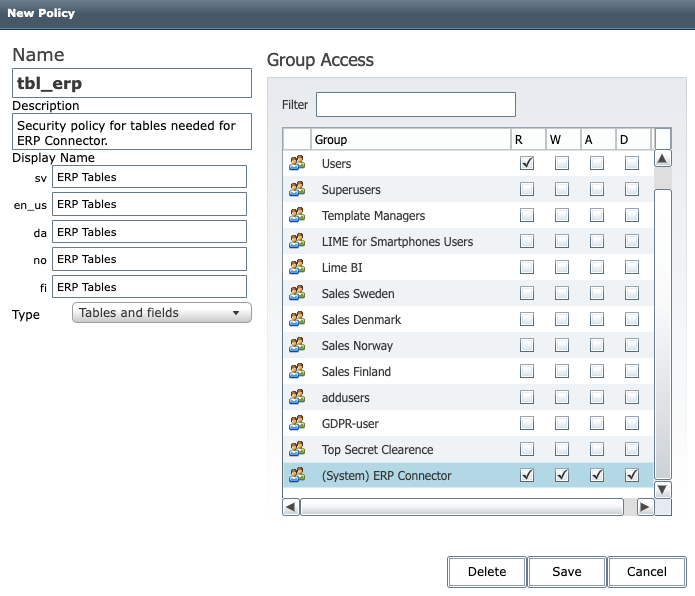
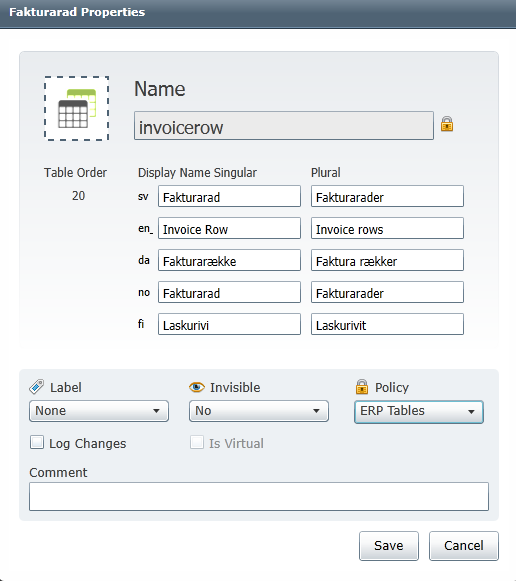
- Add the security policy to the
invoiceandinvoicerowtables.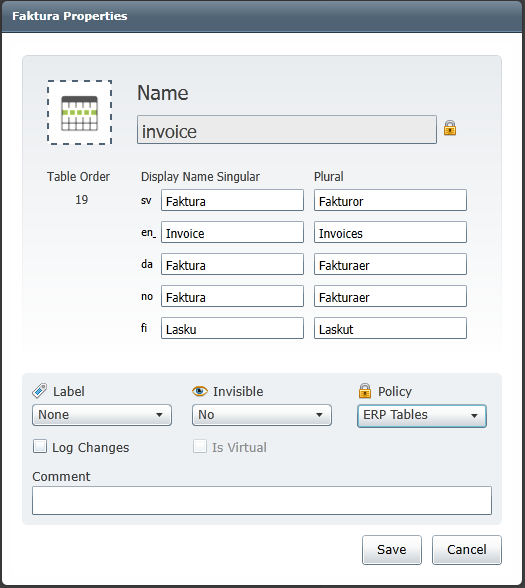
Prepare Additional Limetypes
If any limetypes besides company, invoice and invoice row will be included in the integration, prepare them doing the following:
- If orders or articles should be synced: Follow the installation and configuration instructions for CPQ.
- For each object except company where an instance will need to be configured, create the necessary five system fields in LISA according to the table below. For display names in other languages, refer to the set of these five fields created on the company limetype automatically during the installation.
| Database name | English Display Name | Type | Settings | Purpose | Comment |
|---|---|---|---|---|---|
erp_id |
ERP ID | Text(16) | Readonly. Set label key to avoid duplicates. | Key to identify the right object during the sync. | This field can have different names depending on the context. It may also already exist. For example, or orders it is not needed as there is the order number, and on articles there is the article number. |
erp_status |
Status ERP integration | Option | Readonly | Status to keep track of the sync process. | |
erp_firstsynced |
First sync ERP integration | Time | Readonly, null allowed, no default value. | Indicate the first time an object was ever synced. | |
erp_lastsynced |
Last sync ERP integration | Time | Readonly, null allowed, no default value. | Indicate the last time an object was synced. | |
erp_errormessage |
Error message ERP integration | Text(512) | Readonly | Populated by the integration on error with a specific object. |
Desktop Client
These steps can be skipped if you will not use the ERP Connector from the Lime CRM Desktop Client.
Lime Bootstrap App and Actionpad
- Copy the
addon_erp_connector_statusandaddon_erp_connector_graphfolders in the apps catalog to the subfolderappsin the Actionpad folder. -
In the
companyActionpad:-
Add the link to Copy postal address to invoice address:
<li data-bind="vba:'AO_ERPConnector.copyPostalToInvoiceAddress,' + lbs.activeInspector.ID, text:localize.addon_erpconnector.copypostaltoinvoiceaddress, icon:'fa-files-o'"></li> -
Add the instantiation of the app to the company Actionpad (as shown below).
<div data-app="{
    app: 'addon_erp_connector_status',
    config: {}
}"></div>
-
-
Publish the Actionpads.
VBA
- If a class module ControlsHandlerCompany does not exist: add this (in the Lime CRM Base Solution there is a
ControlsHandlerTemplatethat you can use). Important: Don't forget to add this toGeneralControlsHandleras well. - Add the code marked with
ERP CONNECTOR GRAPH STARTinControlsHandlerCompany.Setup.txt(found in the LIP package in thevbafolder) toControlsHandlerCompany. - Compile the VBA and make sure you do not get any errors.
- Save the VBA.
Two-way Sync for the Desktop Client
- Make sure that LIP is installed. If LIP is not installed, you need to manually download the LIP zip file for the Two-way sync and extract the files necessary from it.
- Enter the VBA editor in the desktop client and run
lip.Install "erpconnector-erpmaster"from the immediate window. - Make sure that the configuration variables at the top of the VBA file
AO_ERPConnector_ERPMasterlook correct. - From the immediate window, run the command
AO_ERPConnector_ERPMaster.Validate. This will print to the immediate window if any of the configuration variables point to tables or fields that do not exist. - In the VBA module
ControlsHandlerCompany, add code marked with ADD-ON erpconnector-erpmaster as in the fileControlsHandlerCompany.Setup.txt. If there is no VBA moduleControlsHandlerCompany: Add it and make sure it is instantiated inGeneralControlsHandler. - In the VBA module
LC_ActionpadCompany, add code marked with ADD-ON erpconnector-erpmaster as in the fileLC_ActionpadCompany.CopyAddress.txt. - Compile and save the VBA project.
Conclusion of Installation in Lime CRM
- After the migration has been made, revised and approved by the customer: set the user
erpmigration@limeto inactive in LISA. - After the first night, verify that the sales trend calculations were run. Look for
limepkg_erp_connector.sales_trend.tasks.calculate_sales_trendin the Task Handler logs. If it says that the daily task was disabled, enable it via the application config. If there are no logs, check out this troubleshoot. Kibana query for cloud customers:docker.hostname : "taskhandler-<CONTAINER-ID or 'shared'>.1.*" and job: "task-handler" and message : "limepkg_erp_connector.sales_trend.tasks.calculate_sales_trend"
Installation of Syncify Service
This is managed by Syncify. Both for on-premise and cloud ERP systems.